


 As a professional ethical hacker, I’m often enlisted to gain access to a company’s IT environment to identify security gaps and vulnerabilities. Although I recommend companies perform professional engagements such as these, I also recommend regular self-assessments, as well.
It’s never been easier for a company’s internal IT to perform their own breach simulations and identify common security holes. There are tools available that can help provide at least the minimum level of visibility into their IT assets to detect an attack or compromised host.
The Tools
Listed below are a few useful tools for performing your own breach simulations. However, I must caution you: PLEASE DO NOT INSTALL, DEPLOY, OR EXECUTE THESE TOOLS ON YOUR PRODUCTION ASSETS. They ALL execute code on the machines where you point them, and many download files from the internet and leave artifacts on disk. I am not responsible for anything you might break as a result of not following my recommendation. With that in mind, here are some of the tools:
- Mitre Caldera
- Uber Metta
- Endgame Red Team Automation
- Invoke-Adversary Powershell Scripts
- Canary Atomic Red Team
Now you might be asking, “If I can’t install these tools on production machines, and I don’t have a lab environment, what am I supposed to do?”
Don’t worry, my good friend. You can get up and going with an eval copy of your Windows operating system of choice at the Microsoft Eval center here or download a developer image tailored to you hypervisor of choice here. If you are limited on hardware resources and just want to dabble, a single virtual machine will be fine, but I would highly recommend creating a full lab environment with a Windows domain so that you can see the full effects of certain attacks against “real” environments. For that task, I would recommend spinning up a copy of “DetectionLab” by Chris Long, which in his words is, “A collection of Packer and Vagrant scripts that allow you to quickly bring a Windows Active Directory online, complete with a collection of endpoint security tooling and logging best practices.” You can download everything you need here.
My recommendation with detection lab is to use a version of Vagrant and Packer that Long has already tested, unless you have just as much fun troubleshooting as you do simulating breaches. I was able to get it working on the current version of MacOS, VMware Fusion, Vagrant, and Packer but not without some pain. I then uploaded all the VMs to my ESXi lab environment for the real fun.
A Simulation to Get You Started
Just to highlight the types of things you can learn from simulating a breach on a lab machine I will show some examples of the aforementioned Invoke-Adversary tool on a patched Windows 7 Enterprise machine with the following configuration:
- Operating System: Windows 7 Enterprise SP1 Build 7601
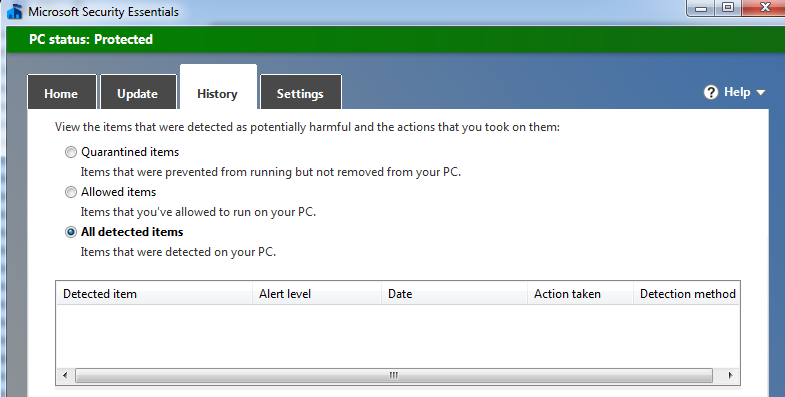
- Microsoft Security Essentials
- Powershell version 3 (note: Windows 7 ships with Powershell version 2 which gives even less logging ability but I needed to upgrade to version 3 in order to run the Invoke-Adversary scripts.)
Note: I chose Windows 7 for this example because it still represents the largest install base in corporate America and around 39% of the overall Windows install base. You will soon see this operating system does a somewhat poor job at detecting common attacks with an out-of-the-box configuration. Thankfully Windows 10 is a much more secure operating system out-of-the-box, but let’s not get ahead of ourselves.
Step 1: From an administrator command prompt, type the following:
powershell -exec bypass
./Invoke-Adversary.ps1
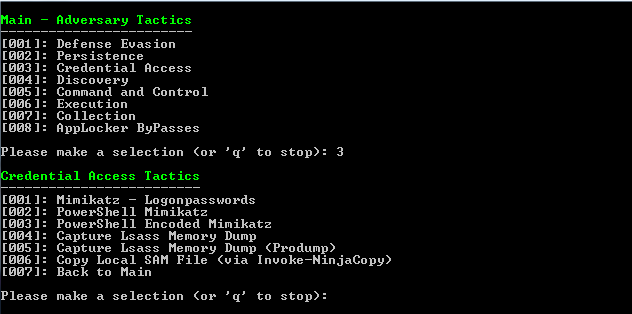
Step 2: Invoke-Adversary Credential Access
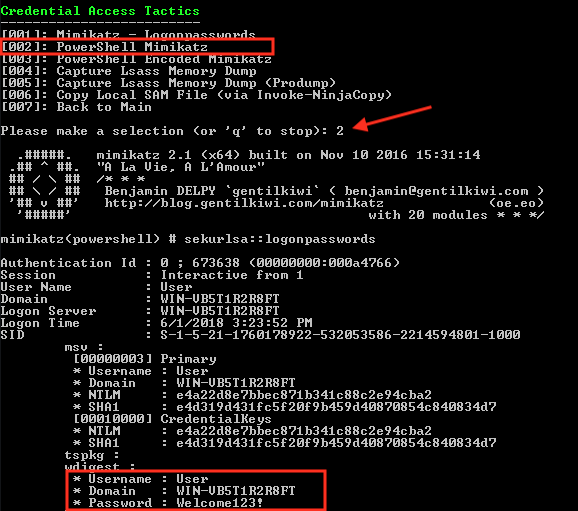
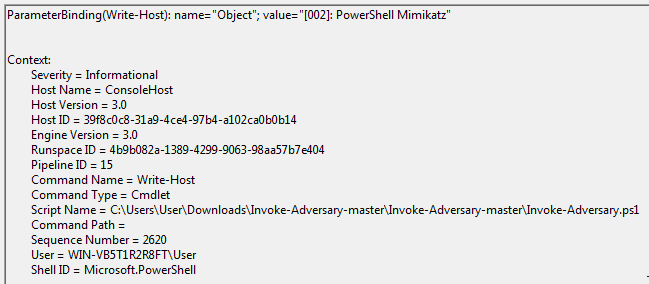
Since credential compromise is one of the most common attack vectors and can be linked back to more breaches than any other cause, let’s start with Credential access and some good ole fashioned Mimikatz. Option [001] downloads the mimikatz.exe binary to disk and attempts to execute it locally, which is almost always detected. For that reason, we will skip it and quickly run through [002]-[007] to see if anything is detected and what activity is logged.
Step 3: Credential Access Tactics [002]
For the sake of brevity and because I want you to go and run these tests yourself, I’m not listing the output of all simulations, but during this simulation, there were no anti-virus alerts during any of the “credential Access” activities except [001], which is downloading the aforementioned mimikatz binary to disk.
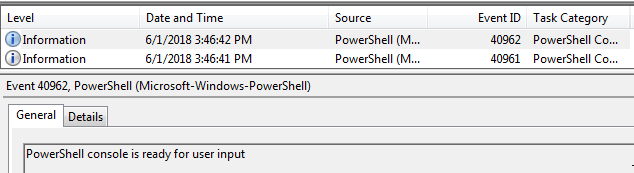
PowerShell Logging - What Your Endpoints Aren’t Telling You
When we go back and look at the Windows Event Log to see if there are any clues to the breach conducted, we are disappointed once again. The only thing we see is that a PowerShell console was opened with no visibility into what, if any, code was executed.
If we look at the Local Group Policy Editor (gpedit.msc) we can see a few options are available to us in PowerShell version 3 but they are not turned on by default. These settings are located under:
Computer Configuration > Administrative Templates > Windows Components > Windows PowerShell
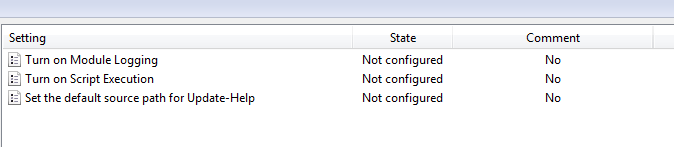
As you can see, none of these settings are configured by default which puts us at a severe disadvantage when it comes to detecting PowerShell attacks. To gain more insight to what code is being executed, change Turn on Module Logging to Enabled, log out/in, and try our Invoke-Adversary commands again.
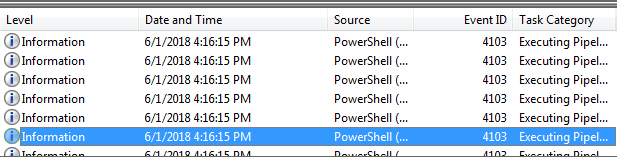
It is now apparent that we are running the Invoke-Adversary.ps1 script and we have more detail about what is going on. This is where having PowerShell version 5.1 really shines because among other things, it gives us verbose script block logging, which can show us the exact code block that was executed on the system.
In Closing
This is just the tip of the iceberg when it comes to simulating a breach, but my hope is that this post:
- Displayed the need and value of breach simulation
- Provided you with lots of resources and a little bit of instruction to get you started. No excuses!
- Showed you the limited visibility and security of out-of-the-box in versions of Windows 7
- Convinced you to up your endpoint security game
C Spire Business' Senior Cybersecurity Consultant Will Enochs may be reached at ask@cspire.com